Warning, this guide contains potential spoilers for the game.
As you reach the second chapter of Tell Me Why, other figures in the game will be available for the two protagonists Tyler and Alyson to hunt down through the levels.
To uncover more of the underbelly of Delos Crossing, there are five more figures to find in Chapter 2 scattered around the game's levels. Some require a bit more effort compared to Chapter 1, so we're here to help. find them.
Here are the five collectible figures from Chapter 2 of Tell Me Why.
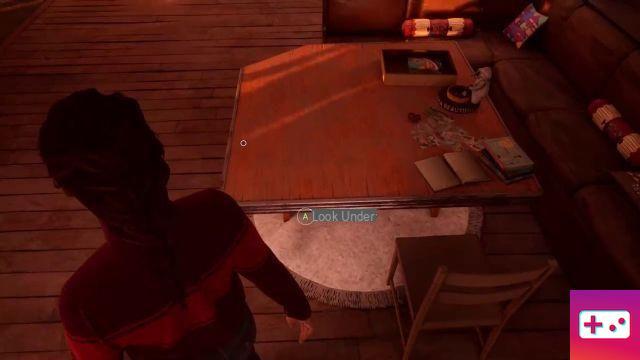
Item 1: The Big Frog
In the first section of the chapter, Ahoy Goblins! Back at the twins' house in Delos Crossing, if you walk over to the table in the living room, on the right side, a prompt will appear that gives you the option to look underneath. On the underside of the table, you'll find the Big Frog glued to it upside down.
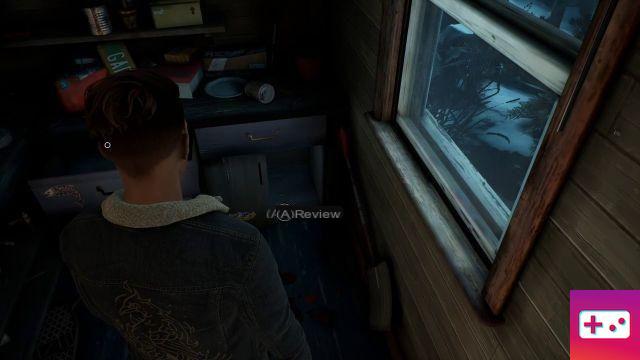
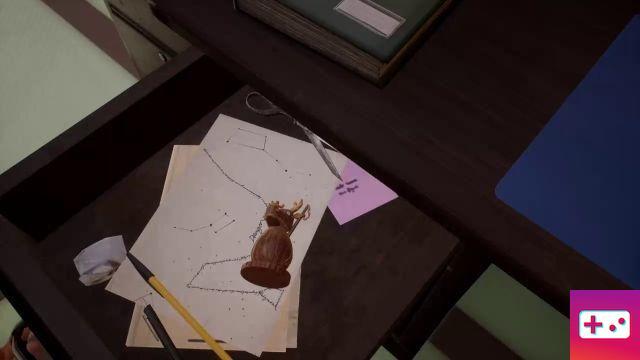
Item 2: The Faithful Reindeer
Returning to Cold Case Police Station, the twins will eventually make their way to the upper floor of the Police Station and into Uncle Eddie's office. Here, if you walk over to his office, you'll find that in the draw on the left side of it is the Stalwart Reindeer available to take.
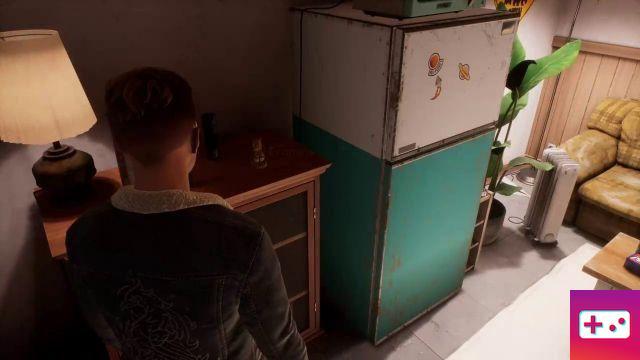
Item 3: The eating muskrat
Back at the store in Plushy Fight! because you will have to progress until you have access to the storage room at the bottom of the floor, where Michael is waiting for you. In the break area and next to the refrigerator is a brown cupboard. Here you will find the Mangy Muskrat that you can examine and collect.
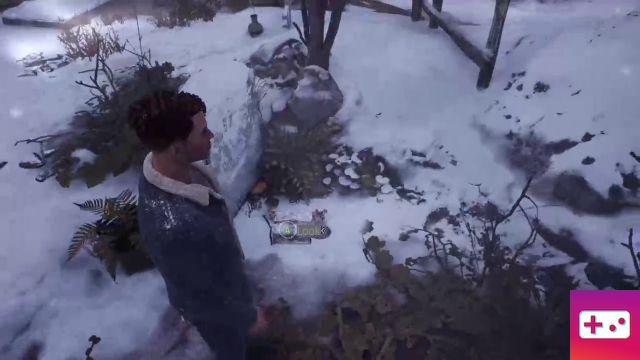
Item 4: The Very Old Beaver
In the Last Rites section, as you progress through the graveyard and witness the memories of the twins, you'll come across a keepsake at Carol Brown's grave. Behind his tombstone, you will find a small box that comes with him, and inside will be the figurine. You can miss it pretty easily if you don't check completely behind it, so be sure to move within sight of the back of the tombstone.
Item 5: The Moon Hag
In the final section of the chapter, Scorched Earth, after the opening sequence, the twins will inspect the barn for damage. If you head to the storage room, where you found the screwdriver in Chapter 1, the cabinet in the corner of the room will house the Moon Hag figure for you to pick up.