These days, streaming PC games on Twitch is more accessible than ever. You can create your Tic account, download free software and start streaming your favorite game.
However, there is one nuance that you will need to learn, and while it may seem complicated at first, it's worth putting in the effort to make sure you're doing everything the right way.
Fortunately, there is plenty of information for newcomers, and most streaming programs are free. They are also becoming more user-friendly. So, if you want to start streaming on Twitch through your PC, here's how.
Make sure your PC can handle streaming
First of all, before downloading Open Broadcaster software or any other live streaming program, you will need a platform that can handle streaming. Streaming on a low-end computer is incredibly difficult because rendering a game, saving it, and uploading it to the internet are demanding processes on a weak CPU, RAM, and GPU. So if your computer struggles with 3D games like Overwatch, Counter-Strike: Global Offensive, or Dota 2, then you'll want to buy a better computer before you start your Twitch career.
Below are the hardware specs Twitch needs for its own streaming software, with gameplay also taken into account.
Minimum system requirements for Twitch Studio:
- Operating System: Windows 7 64 bit
- GPU: compatible DirectX 11
- RAM: 4+ Go (2 Go gratuits)
- Processor: 4-core Intel or AMD
Twitch Studio Recommended Specs:
- Operating System: Windows 10 64 bit
- GPU: NVIDIA GTX 10 series or newer
- RAM: 8 Go +
- CPU: Intel or AMD 8-thread
These might be a bit dated now, so a better way to look at it is that you need a PC that can comfortably play the game you want to play, and have some power to support the streaming side. things too. Streaming is quite intensive on your PC, so the better your build, the more time it will have to handle the demands you place on it.
Keep in mind that these system requirements are for streaming only. You might need a better computer to stream more intensive games like Rainbow Six: Siege or Grand Theft Auto V. However, 2D PC games aren't as PC intensive as 3D titles, so Mid-range PC owners may be able to stream games like Hearthstone or indie titles like Binding of Isaac and Into the Breach just fine on Twitch. But if you're interested in long-term Twitch streaming, start saving money on a gaming PC now, even if it's just a pre-built one.
In addition to your PC's hardware, you'll want to make sure your internet connection is also rated for Twitch streaming. Internet connections with low bandwidth or heavy traffic may have trouble sending download data to Twitch. For newcomers, Tic recommends setting broadcast software encoding presets to “Very Fast” for a less demanding experience on both the broadcaster's PC and their internet connection.
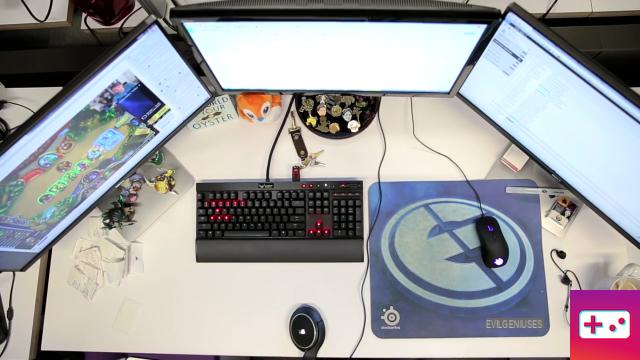
Get some decent gear
At a bare minimum, every streamer should own at least one microphone and headphones or earphones. You'll want the former to interact with your viewers and the latter to reduce game audio in streaming mode. After all, the last thing you want is an annoyed audience complaining about the audio echo from your cheap $10 microphone.
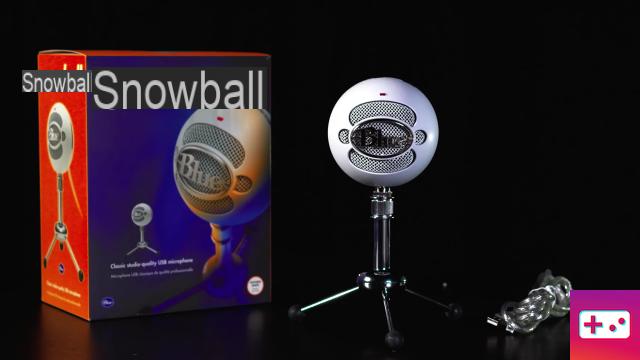
For a beginner mic, the Blue Snowball offers great sound quality at an affordable price, and it connects to your computer via its USB port, making it versatile enough for any gaming PC case. On the other hand, if looking for a headset with a built-in microphone, the HyperX Cloud II Gaming Headset is a popular choice among Twitch streamers new and old for a headset just under $100.
You might also want to get a webcam show that you can stream yourself while playing the game. Many viewers on Twitch appreciate that personal touch and it helps build a connection with the audience. You can opt for something like a Logitech C920 when you first start up, as it's a very respectable webcam.
If your stream starts to take off, you can upgrade your gear to your heart's content, upgrading to new microphones, headsets, cameras, or even buying lights like the Elgato Key Light or an Elgato Stream Deck to boost your streaming values. production. However, it's normally a bad idea to start investing in any of this before you have an audience.
Identify the games you want to stream and your style
Twitch is a personality and gameplay driven streaming service, which means you'll want to cultivate your audience around a specific type of brand. Are you funny, charismatic, and goofy, or are you a laid-back gamer who enjoys hanging out with your viewers? Or are you a Fortnite player who rages on camera when losing games? There's plenty of room for all kinds of people on Twitch, so figure out your goals first and grow your on-screen persona from there.
Also think about the type of games you want to stream. Action-packed multiplayer games are always a great choice, and battle royale titles like Fortnite, PlayerUnknown's Battlegrounds, and Kingdom Royale have huge online followings. Competitive first-person shooters such as Overwatch and Battlefield V are also great choices, as are MOBAs like Dota 2 and League of Legends.
You should also understand that finding an audience for an already well-known game, with many popular streamers, is going to be difficult. Unless you're a mechanical god playing at the highest level, you're unlikely to break through. As such, it might be a good idea to focus on a game you like that doesn't have a lot of people streaming, or even cover an upcoming game that has some hype around it when streaming. its launch.
Setting up your streaming program
Now that you have the hardware, games, and gear to start streaming, there are a few streaming programs worth checking out to get your Twitch stream started. We'll look at three of the most popular recommended by Twitch: Twitch Studio Beta, Open Broadcaster Software, and XSplit.
To use any of these products, you will need your Twitch Stream key. To find it, open your Twitch settings by clicking on your profile picture in the top right corner. Click Settings, then the Channels & Videos tab. At the very top you will see “Primary Stream Key”, click the Copy button so you can quickly paste it into your streaming software.
Twitch Studio Beta
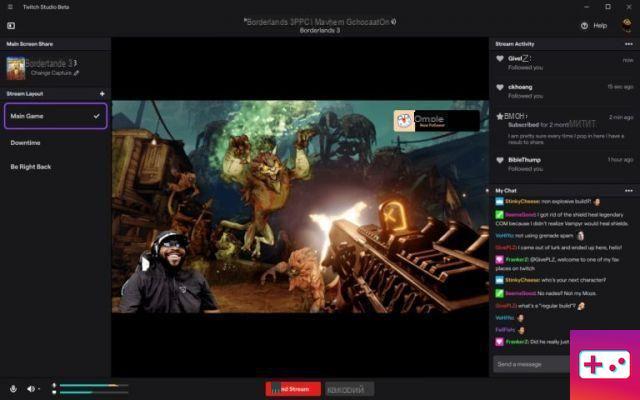
Twitch has its own software called Twitch Studio Beta. It's designed to be as simple as possible and holds your hand well throughout the initial setup.
Open Broadcaster software
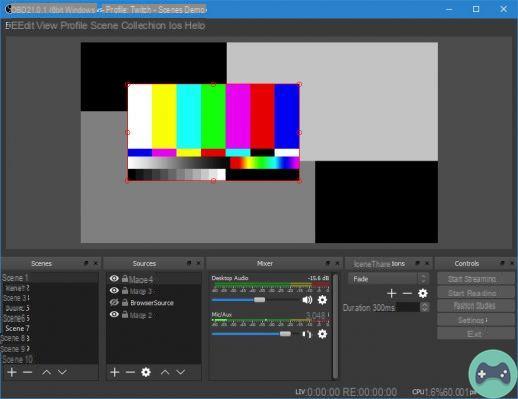
Also known as OBS, Open Broadcaster Software is one of the most popular (and powerful) Twitch streaming programs available. Although OBS requires more setup than Bebo, it gives streamers the ability to truly own and customize their streaming experience, from advanced overlays to personalized subscriber alerts. And for power users looking to play around with their encoding settings, OBS is a beast of a program.
Before you begin, head to your Twitch user account dashboard and check the Channel tab in the sidebar under Settings. To use OBS, you need to copy your Stream Key, which is a unique set of characters that Twitch uses to authorize third-party programs to stream on a specific user's Twitch channel.
If you want to stream with OBS, here's our quickstart guide to setting up your channel.
- Run the OBS Auto-Configuration Wizard. This will give you a basic setup for using OBS and some basic encoding settings that your system can handle.
- On the main screen, click the plus sign under Sources and add a Game Capture or Window Capture source. Choose the game executable you want to stream.
- (Optional) Add your webcam as a video capture device. Click the source on the preview screen to reduce or increase its size.
- Click the Settings button and navigate to the Stream tab. Make sure Streaming Services is selected as the stream type. Select Twitch as the service and enter your stream key.
- Go to the Output tab and make sure Simple is selected under Output Mode. This should be fine for now, although you can always change these settings between streams.
- Click on the Audio tab and make sure your microphone is selected under Microphone / Auxiliary Audio Device.
- Exit the Settings tab and click Start Broadcast.
On the Open Broadcaster Software Help Section website, OBS also offers additional tutorials on troubleshooting common problems. Be sure to read its tutorial wiki for more advanced customization options as well.
XSplit Gamecaster
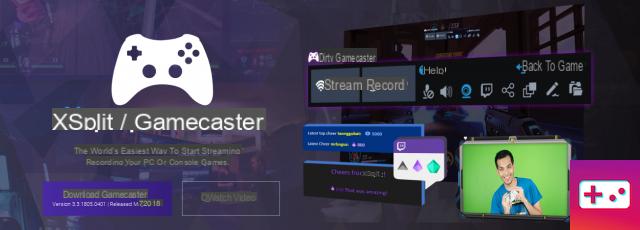
XSplit is something of a rival to OBS, and the two programs have been competing for quite some time. On the one hand, XSplit lacks the plugin support that OBS has, but it makes up for it by offering some pretty nifty audience overlay options to make streaming much easier while playing games.
XSplit has two different iterations, XSplit Broadcaster and XSplit Gamecaster, and both offer two premium options for dedicated fans. But the free version of XSplit is available for download with many basic features intact, and it's great for beginners as well.
Here's how to get started using XSplit Gamecaster for streaming on Twitch.
- Create an XSplit account and log in.
- Head over to the Settings tab and click the gears next to the Stream Settings drop-down menu. If you want to stream in HD, set your output resolution to 720p HD, your frame rate to 30 or 60 FPS, and your quality to High. This can be changed later for more advanced settings.
- Under the Devices heading, make sure the Microphone tab has your broadcast microphone selected. If you're using a webcam, make sure it's also selected under the Camera tab.
- Click on the Accounts tab and select Twitch as the live streaming service. Log into your Twitch account and authorize it for XSplit Gamecaster.
- You are ready to stream! Enter the game you want to live stream, open the XSplit Gamecaster overlay by pressing Ctrl and Tab, then click Stream.
For more information on using XSplit, read the User Manual program.
Streamlabs
Streamlabs is something of a one-stop-shop for streamers. It's a bit more advanced than everything else on the list simply because it covers everything they do, and more. You can run all your overlays there, choosing from a range of preset options if you want, and it can also manage things like donations and display bits given to you by spectators. It's something you won't have to worry about when you first get started, but Streamlabs is almost certainly where you'll end up if your stream takes off.
take care of yourself there
Now that you're ready and ready to stream, it's time to get started and join Twitch. But before you go, remember to watch out for yourself online.
Streaming is quite intensive and requires a lot of energy to simultaneously play a game and entertain the viewers. So before you start hosting marathon Hearthstone streams on Twitch, make sure you're properly prepared to handle the work of streaming. This means eating ahead and blocking out a few hours to stream.
Also remember to stay hydrated: drink plenty of water before, during and after the stream. Take breaks to get out of your seat and stretch your legs. Success on Twitch is a marathon, not a sprint, having a plan and sticking to it is important. Be sure to eat good, healthy foods, drink plenty of water, and avoid “gamer” drinks that only lead to sugar crashes and bad eating habits.
And above all, know your limits. If your throat hurts, your feet feel numb, or you're tired, listen to what your body is telling you. The last thing you want to do is go viral r/LivestreamFail to fall asleep during your PUBG playthrough.
Ana Valens contributed to this article.