Home security is very important in Minecraft, so leaving the main entrance to your castle wide open at night is not a good idea. However, safety is not all that matters. Arguably more important is making your home base look cool and creative, and a portcullis entrance to your castle would do just that, as well as securing your fort.
Here's how to build a working portcullis for your castle entrance in Minecraft, including all the crafting parts you'll need.
How to Build a Portcullis Gate in Minecraft
For those who play Minecraft Bedrock Edition, don't worry; this design will work for you. Redstone is notoriously buggy in Bedrock Edition, but this design opens slow enough not to cause a problem. Those playing on Java may be able to safely speed up the design by reducing the number of ticks on repeaters, but Bedrock users should avoid doing this.
This design is for a portcullis three blocks high and can be up to 13 blocks wide. The guide will use a three block wide design for simplicity, but it can be easily extended to fit your door size. For this three-wide craft, you will need the following:
- Six sticky pistons
- 12 regular valves
- Nine redstone repeaters
- Three redstone torches
- 12 gravel blocks
- Nine fence posts
- Some building blocks and redstone dust
The amount of redstone dust you need depends on the distance of your open/close buttons. You're unlikely to need much more than a single stack unless your doorway is very wide. For every additional block of width your gate has, you will need three additional fences, four additional gravel blocks, four additional regular pistons, and two additional sticky pistons.
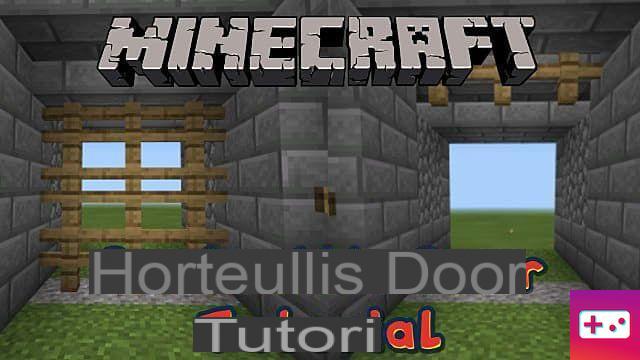
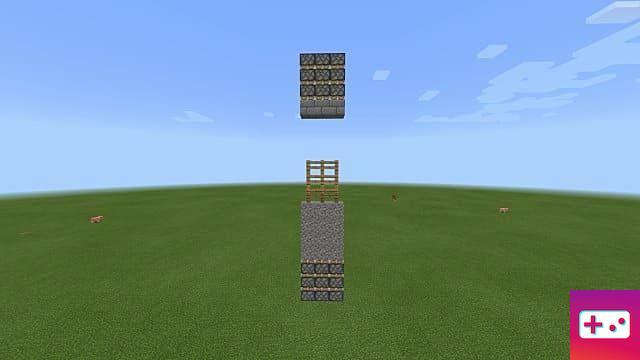
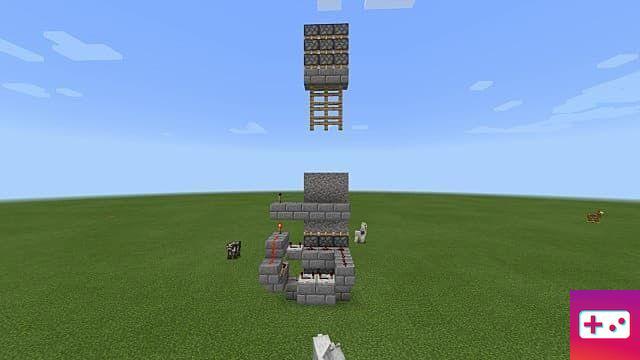
This is how your door should be installed. The top piece of gravel in the image below is at ground level. The fences above are what will be pushed up to open the gate. The pistons at the top will need to be hidden in the top wall of your castle if you want to hide the redstone. The bottom two rows of pistons under the gravel are sticky pistons, while the rest of the pistons in the design are not.
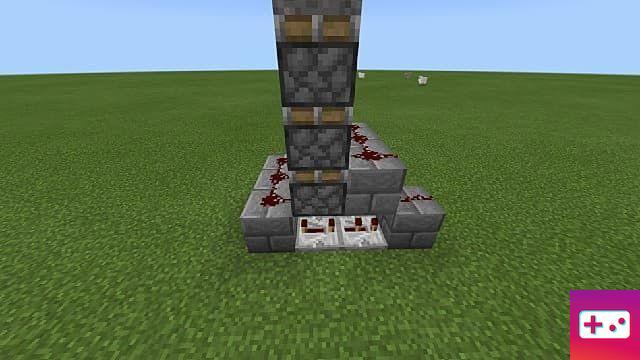
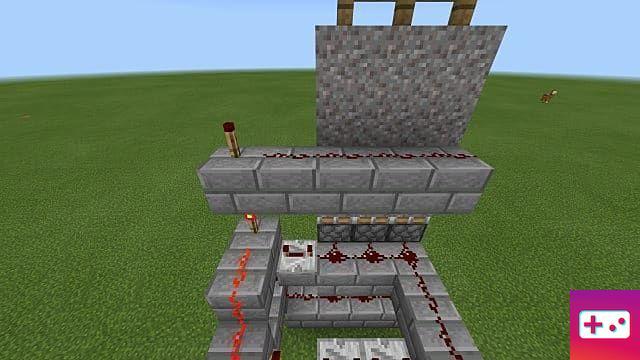
To start, line some red stone around the bottom pistons as shown below. There are only two repeaters, which should be installed under the rightmost plunger of your door.
Now connect the second row of pistons as shown in the picture below. Be sure to place the repeater on top of an upside-down tile so you don't cut the redstone wiring underneath.
The button on the left is where your input will go. Your button will, of course, be above ground, but just make sure it's wired to a repeater that goes to that same input block.
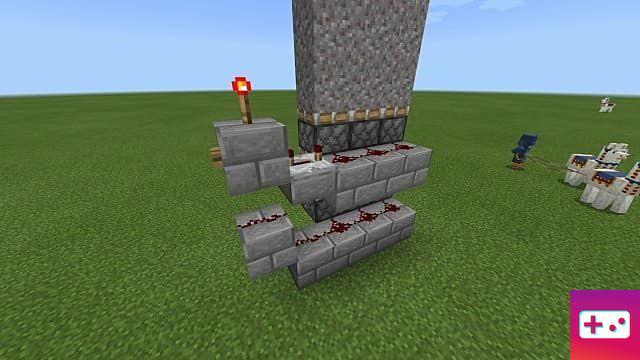
Extending from the side of the wiring you just placed, run some redstone dust from the torch to another torch as shown below, which should reverse and go out.
Place two repeaters that go to the same row of redstone you just placed for the second row of pistons. Be careful not to miss the dust to the right of the “off” torch in this image.
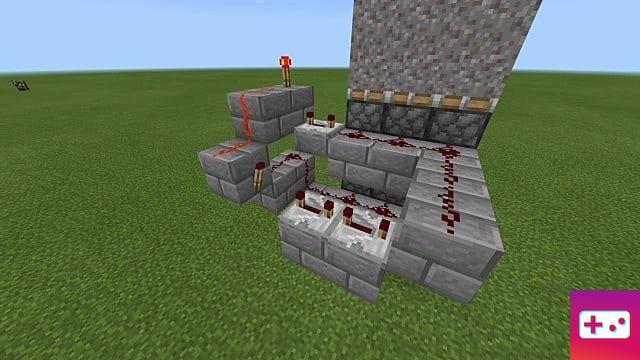
Finally, above the "on" torch, place another torch with some redstone dust running to the right. This dust will activate the upper row of pistons. One block above this dust will be your ground level.
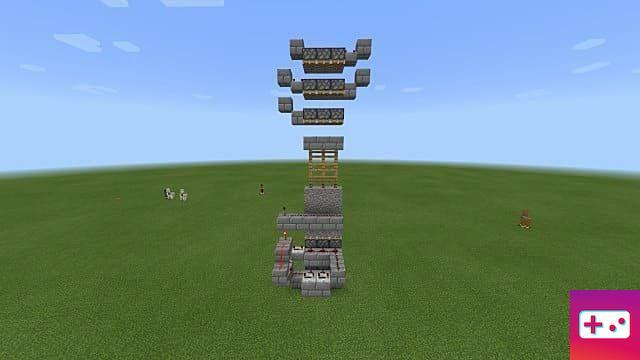
That's all you need for the bottom of the gear. Press the button to verify that it works. You should expect to see the fences go up and then the gravel retract completely into the ground.
Now is the time to wire up the upper pistons, although these are much easier. You don't have to worry about them retracting, as the underground pistons will push the upper pistons back into place every time you open the portcullis door, automatically.
As such, the wiring is incredibly simple. Again, this button is simply a placeholder for your repeater input location.
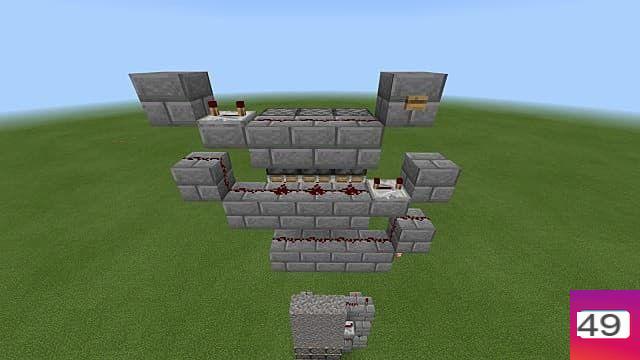
Press that button and you should see the three pistons push the fences down, closing the castle gate. You should now be able to see how the lower pistons will push these upper pistons back when the fences are raised.
That's it! Building a functional portcullis for your castle in Minecraft is as simple as that. Now all you have to do is build your castle walls around the red stone to conceal it, run your buttons to the entrances, and your gate is complete. If you found this guide helpful, consider checking out our other Minecraft guides while you're here!