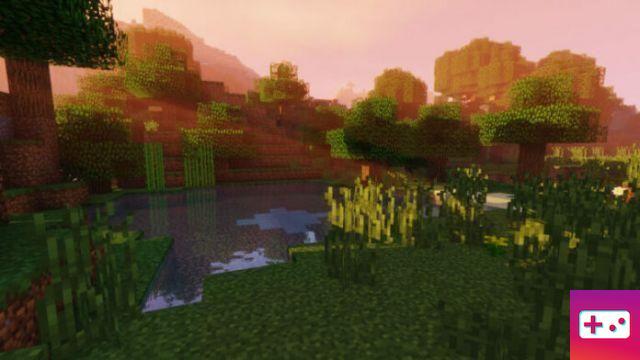
Minecraft shaders completely change the visuals of your Minecraft world. Usually they allow high customization of how the game works to suit your needs and a commensurate balance between performance and quality. In the guide below, we explain how to install Shaders in your Minecraft files.
For this guide, we will be using BSL shaders. However, there are many awesome Minecraft shaders out there. You can use the list below to download the shader that suits you best. When you've chosen the one you like to install, follow the remaining instructions.
The first thing to do if you want to install this shader is to download and install OptiFine. OptiFine is currently the best way to modify the visuals of Minecraft and allows for better performance of your computer when rendering the look of the game. To learn how to install OptiFine, use the following link: How to install Minecraft OptiFine.
Once OptiFine is installed, you are ready to install your selected Shader.
Step One: Download the Shaderpack
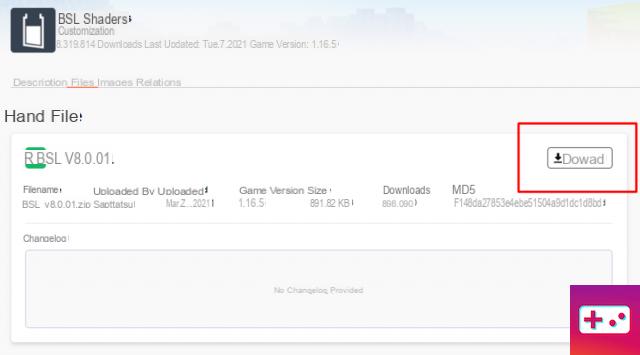
The links above lead to the direct download page for each individual shader. You can see an example of this in the image above, but not all download pages will look the same. If your web browser warns you against downloading files like this, that's normal. The web pages we have linked lead directly to the official download pages, so they are safe to download.
Step Two: Install the Shaderpack
Installing Shaderpacks is a simple process and mostly requires a quick drag and drop. This is a significant change from the old process where you had to manually manipulate files. Continue with the instructions below to complete this step as easily as possible.
Find your .minecraft folder by going to your start/search bar on your desktop and type %appdata%, then hit enter. Once you do this, a folder will open. At the very top of this folder is probably the .minecraft folder. Double-click this folder to open it.
Related: Best Minecraft Shaders For 1.16+ (2021) – Pro Game Guides
Inside this folder you will see several Minecraft folders for your game. Double click on the folder that says shaderpacks. Now that you have this folder, open your Downloads folder (where you installed the shaderpack) in another window. Drag the zipped shaderpack file into the shaderpacks folder. That's basically all you need to do to install it!
Third step: select the shader
Now that it's installed, all you have to do is select it in-game. Open your Minecraft launcher.
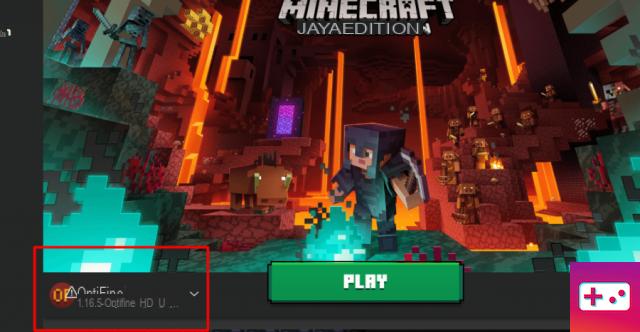
At the bottom, make sure the version you have selected to play says OptiFine like in the image above. This is a mandatory step. Shaderpacks will not work properly if you are using a different version. Once you've decided which version you're using, click Play.
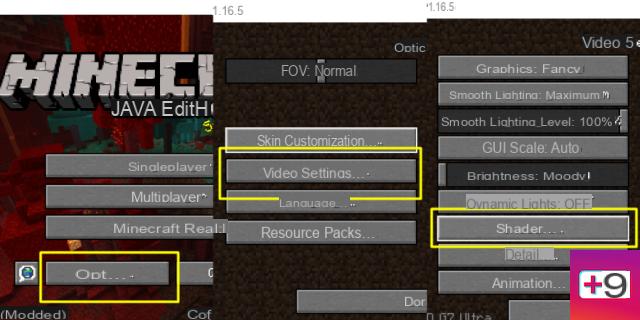
Once you've opened the main Minecraft title screen, use the following instructions to select your shaderpack.
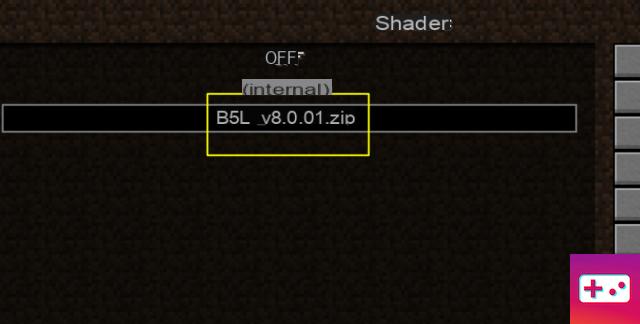
You will now be in a window that lets you choose from the shaders you have installed in the Shaderpacks folder. Select the shaderpack version you just installed. You can see an example of this in the image below.
Now that you've done that, you're done installing the Minecraft shader! Now you can enjoy the massive improvement in visual quality.
Want to use your new shader on an adventure map? Check out our list of the best Minecraft adventure maps for 1.16!