The Conduit was added to Minecraft in version 1.13 and it was instantly loved by people who don't mind swimming in the game (which admittedly isn't a lot of us). However, there is now additional interest in the Conduit as, as of Version 1.16, the Conduit Power status effect now applies in the rain, no swimming required!
How to make a conduit in Minecraft
This article consists of two parts. The first part will explain how to craft the conduit in the crafting table, and the second part will explain how to activate it. If you already have the Conduit and want to enable it, go ahead and skip to the second section.
Section One: How to Make the Conduit
-
Materials. Below are the materials you will need and a brief explanation on how to obtain them.
-
Nautilus Shell x 8: You can get these in the following ways.
- Wandering Merchant – 5 Emeralds
- kill drowned
- Peach (rare)
-
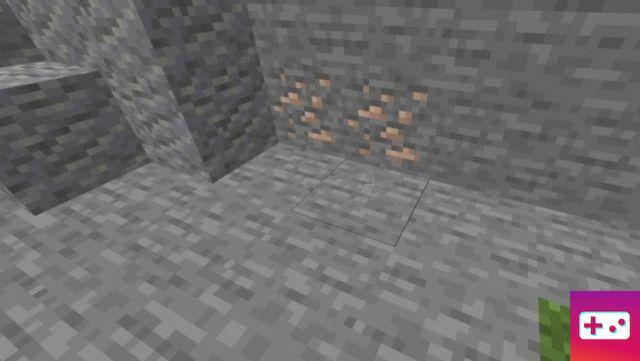
Heart of the Sea: You can only get it by finding a buried treasure located with a buried treasure map. These are found on shipwrecks and ocean monuments.
-
-
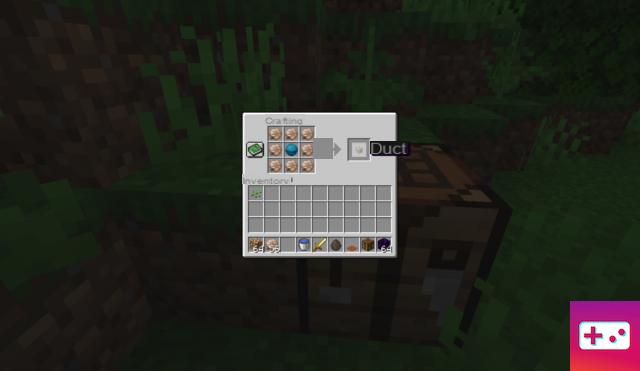
Recipe. The recipe is simple. If you don't see the image below, you can craft with a crafting table by placing the eight Nautilus shells around the heart of the sea.
Related: Minecraft Smithing Table Recipe: How to Use a Smithing Table in Minecraft - Pro Game Guides
Section Two: How to Activate the Conduit
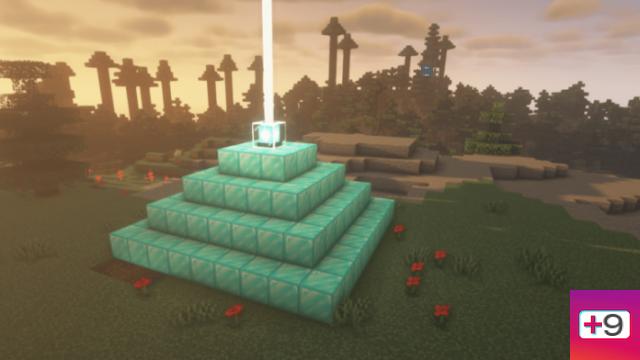
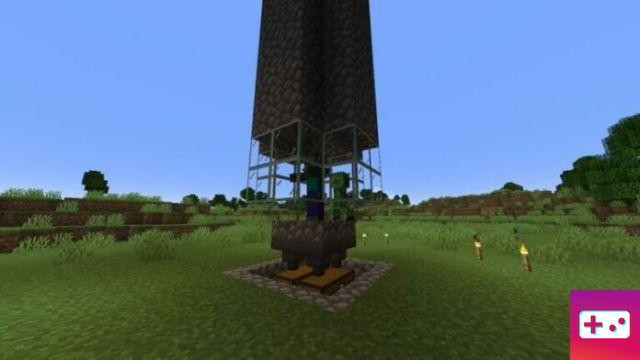
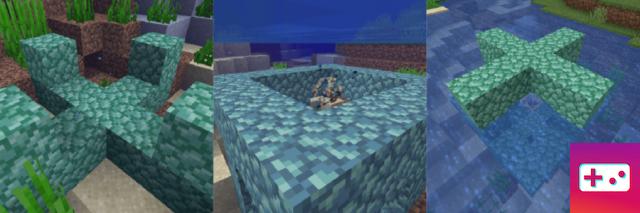
The conduit has a range of 32 to 96 blocks depending on how many Prismarine blocks you have placed around it. The most efficient way to maximize the duct's power range is shown below. The easiest way to activate it is to place it underwater and build around it. If you want to build it above water, you must enclose the entire structure to prevent water from flowing out. Let's walk through the steps to create the Conduit structure. you will need
-
Step One: Place nine blocks in a plus sign pattern, then one block above each end.
-
Second step: place another block on each block of the second layer and place a conduit in the center. Place the corners of each block on this layer, forming a square for this layer. Note: At this point your Conduit will activate, but the Conduit Power will not have its full range of effects until you complete the rest of this structure.
-
Step Three: Imitate the first two layers for the top two layers, but in reverse. Follow the design in the picture above.
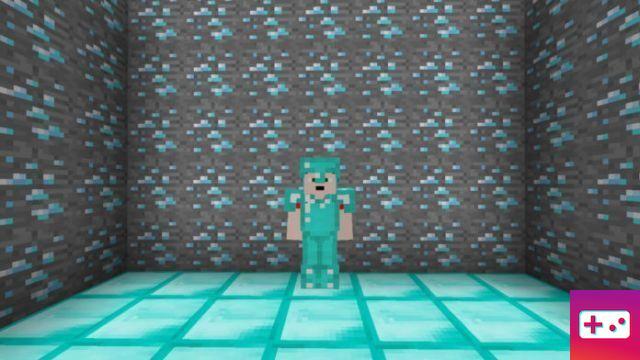
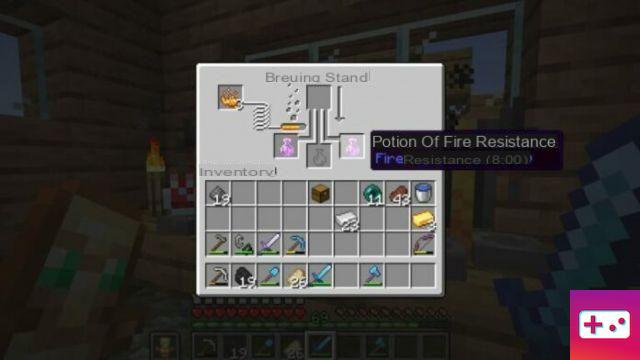
You now have a conduit enabled and a full range of effects. The Conduit has its limits, however. You only receive the Conduit Power if you are in the rain or underwater. Conduit power provides underwater breathing, haste, and night vision. If you have one near an ocean monument, you're ready to fight the Ancient Guardian with no handicap!
Don't forget the other new features in Minecraft 1.16! Take a look at Crying Obsidian!